Tuesday, 25 January 2022

3 Royal Tank Regiment in 15mm - 'Hybrid' Sherman Firefly

With 5 Skytrex and 5 PSC models, I had a problem - I would have to mix manufacturers within a troop and, though the models match quite well, I thought that would be too much. I decided therefore to modify a spare Skytrex M4 by lengthening the hull a bit, creating new engine deck details and adding the extra armour panels on the turret and hull sides. Fairly quickly I realised that would be a lot of work for questionable results but it occurred to me that every PSC sprue came with two upper hulls and two turret top halves for 75mm and 17pdr variants so I had 5 spares and decided to mate one of them with Skytrex lower hull and running gear components and scratch build the rest of the bits.


This was actually quite straightforward, if a bit time consuming. The only real problem was the join between the bottom of the glacis and the hull front so I hid that behind a lot of stowage, taking inspiration from a picture showing a similar arrangement. The running gear - track components from the M4 are obviously shorter than those of the stretched M4A4 and the track type is the rubber-block version that was apparently less popular with the British but this isn't too noticeable unless you are looking for it and the completed model blends in OK at normal viewing distances.

Sunday, 16 January 2022

3 Royal Tank Regiment in 15mm - Skytrex and Plastic Soldier Co.

From what I've read, 4 KSLI most often found themselves partnered with the 3 RTR in 11 Armoured Division so that was the obvious choice as the main armoured element of my 1944 British force. 

When I first started collecting 15mm WW2, I naively thought a Sherman was a Sherman, only later learning that the British Armoured Divisions used the Sherman V - unfortunately I had bought and painted the wrong variants. I later bought five Skytrex models of the Sherman V / M4A4, including a Sherman Vc 'Firefly' but only got round to completing one of them before moving on to other projects. By the time I picked them up again, I had decided I wanted ten or eleven tanks to represent a squadron (3 troops of 3 plus an HQ of 1 or 2). Skytrex prices had increased from £10 for three tanks to £7 each. In the meantime injection moulded plastic had arrived and I couldn't resist a pack of five '15mm WW2 Allied M4A4 and Firefly Sherman Tanks' in the Plastic Soldier Company sale, for only £15. 

This mix of Skytrex and PSC models of course brings a problem of compatibility. The models actually match quite well in overall sizes but there are a few detailed differences and some features that one represents better than the other. It is interesting to compare the advantages and disadvantages of the two materials and moulding technologies. The PSC injection mouldings are crisper, with none of that distortion sometimes seen on larger spun-cast components from rubber moulds. However there can be no undercuts so many more components are needed and draft angles are a big issue, being very noticeable (for example) on the add-on armour patches on the hull sides. Because of the draft angle issue, PSC seem to have just given up with the pistol ports on the turret side and these bear little resemblance to the originals. There are also significant traces in some areas of what I assume must be scanning lines from a rapid prototype original or cutting the mould.

I corrected the hull-side armour patch draft angles on the PSC models by filing but there was only so much I could do with the pistol ports without effectively free-hand carving them from solid.

Both manufacturers give the M4A4 75mm a choice of the early M34 or later M35A gun mantlets. Most (but not all) of the pictures I found of 3RTR in Normandy had the M34A variant so I went with that. Skytrex use a one-piece casting which is much smaller and lighter looking and, to my eye, looks wrong so I took spare PSC Firefly mantlets and modified them to match the PSC M34A mantlet. I made the gun barrels using the same miliput around brass rod technique that I used to make lances for my Italian Wars Gendarmes.

I had bought some packs of Skytrex tank stowage and the PSC models come with lots items like spare tracks, jerry cans and idler wheels so I used a variety of these across both manufacturer's models.

You might have noticed in the photo above I glued the turret hatches on the PSC model the wrong way up. Even without this basic error, they stuck up much higher than they should and more than the very flat ones from Skytrex. I filed them down to match better and added details of the periscope and handle. The turret hatch diameter on the Skytrex model is quite a lot smaller than on the PSC model but there wasn't much I could do about that without major surgery and adding the same periscope details as for the PSC model would have just drawn further attention so I left them as they were.


The representation of the storage bin fixed to the back of the hull was very different - the Skytrex version was much too small and lacking the correct angle so the top points up when glued in place. Luckily the PSC sprues were almost the right cross section so it was easy to make new ones from those and bits of 0.25mm plastic sheet.

The bins on the back of the turret were quite similar and all I did there was make a new lid for the Skytrex models from 0.25mm plastic sheet to make sure it was square and had about the same overhang as for PSC.

One very noticeable defect on the PSC model is a series of trenches on the glacis plate, looking as though it was made up of separate pieces. Somehow I missed this on the first model but for later ones, I filled them in with Milliput, then scraped, filed and sanded to a smooth finish.

Skytrex on the left and PSC on the right.


PSC on the left, Skytrex on the right

With a bit of work I think the models match pretty well - certainly well enough to share a table, though maybe not side by side in the same troop. If I was starting from scratch, I suppose I'd have to choose the PSC version on cost and for having more and sharper detail but, even with weights added to the hull, there just seems something wrong with lightweight plastic tank models compared to the satisfying heft of metal and the PSC model takes longer to assemble and tidy up.

These are the first vehicles I have completed with air brushed panel hi-lighting, filters and washes, rather than my previous dry-brush technique. It was a lot harder and more time consuming than I had expected but I prefer the end result and I'm sure I will get better and quicker with more experience. 

The transfers are all from Skytrex. Although the real ratio is obviously one armoured regiment to one infantry battalion, I am only planning on representing one squadron - B squadron. 3RTR was the second most senior tank regiment in the division so a 52 on the red arm of service marking and yellow for the squadron marking.


Saturday, 4 December 2021

First German company complete for Normandy 1944

I've finished my third German platoon plus a couple of tripod mounted MG42s and with them a first company to my new basing (and painting) standard.

This time the varnishing went more smoothly. They were painted in two batches and one was finished with an airbrush application of Mig Ammo Lucky Ultra-Mat varnish whilst the others have my previous usual Windsor & Newton but with a bit of white spirit added - I think my previous problems with this varnish may have been because it had evaporated a bit too much and become too thick. To be honest, I can't now tell which were which.

One thing I did different this time is that for the figures I was going to paint with helmet covers, I smoothed over the helmet a bit with Miliput to avoid the sharp flare of the lower edge. I'm not sure this is 100% accurate or very visible at this small scale but it made me feel happier about the mix of hemet finishes.

All the figures are Peter Pig but they are a mix of older and new sculpts. The figure above with the Panzerfaust is one of the old ones and, to a degree, I prefer it to the new ones. The detail is more pronounced and the casting is cleaner with less filled in excess metal, contributing to it being easier to paint. On the other hand, the pose is more wooden, proportions less realistic and the face even more stylised than (the new) normal for Peter Pig. Swings & roundabouts!


I did a couple of tripod MG 42s to go with this company. Again these are the newer Late War sculpts. 


So that's a first company done and I'm heartily sick of Field Grey. I have another usable company with my old basing and painting so hope that will be enough German infantry to get started. I've a game of 'O' Group arranged for Monday so these will be on the table then. I'll try to take a few photos and post something on here.

In the meantime I've been busy with some Shermans - 3 RTR to go with my 4 KSLI from 11 Armoured Division. Airbrushing of colour modulation and panel high-lighting complete with filters and washes to do - lots of new techniques to explore.


Friday, 26 November 2021

Battle of Adrianople 378 CE

An friend of mine, Dave, is working on a refight of the Battle of Adrianople for a Society of Ancients game day in 2022 and kindly offered to give it a run through as a learning exercise for me with Mortem et Gloriam and to give my 15mm Late Imperial Roman army a first outing. As this was a refight and is intended as a demonstration game, the scenery was pre-defined rather than using the normal MeG pre-game mechanism and there were some special rules, particularly on movement in the deployment phase. 

Goths

  • Fritigern - Talented, instinctive
  • Alatheus - Competent, instinctive
  • Saphrax - Competent, instinctive
  • ANO - Competent, instinctive
  • Camp - Poor, Fortified
  • Comitatus Cavalry - 6 Cavalry, Formed, Loose, Superior Protected, Short Spear, Melee Expert, Dismountable
  • 4x Warriors - 8 Infantry, Tribal Flexible, Average, Protected, Unskilled Javelin, Short Spear
  • Ex-Roman Infantry - 6 Infantry, Formed, Flexible, Average, Protected, Unskilled Javelin, Short Spear
  • Archers - 8 Infantry, Formed Loose, Average, Unprotected, Experienced Bow
  • Comitatus - 6 Cavalry, Formed Loose, Superior, Unprotected, Devastating Chargers
  • 3x Cavalry Warriors - 6 Cavalry, Formed Loose, Average Protected, Short Spear
  • 2x Archers - 9 Infantry, Skirmisher, Average, Unprotected, Experienced Bow, Combat Shy
  • 2x Alans - 6 Cavalry Skirmisher, Average, Unprotected, Experienced Bow, Cantabrian
  • Huns - 6 Cavalry Skirmisher, Average, Unprotected, Experienced Bow

Romans

  • Valens, Cassio, Trajan & Victor - all Competent Professional
  • Camp - Formed Loose, Average, Protected
  • Scutari - 4 Cavalry, Drilled Loose, Superior, Protected, Unskilled Javelin, Short Spear
  • 2x Equites - 4 Cavalry, Drilled Loose, Average, Protected, Unskilled Javelin, Short Spear
  • Equites Dalmatae - 4 Cavalry, Drilled Flexible, Superior, Protected, Experienced Javelin, Short Spear
  • Cataphracts - 4 Cavalry, Drilled Close, Average, ArmHrs/FArm, Long Spear, Devastating Chargers, Shove
  • 3x Auxilia - 6 Infantry, Drilled Flexible, Average, Protected, Experienced Darts, Short Spear, Shield Cover
  • Auxilia Sagitarii - 6 Infantry, Drilled Loose, Average, Unprotected, Experienced Bow
  • Equites Sgitarii - 4 Cavalry, Skirmisher, Average, Unprotected, Experienced Bow
  • Archers - 6 Infantry, Skirmisher, Average, Unprotected, Experienced Bow, Combat Shy

The rest of the post below is Dave's summary and assessment of the game, interspersed with my photos and captions.

The test game went quite well. It played for 10-11 turns and was eventually narrowly won by the Romans, who were themselves one break away from their TuG to break limit.

We used three special rules:

Gothic cavalry arrival:
Cards dealt to the two cavalry commands as normal but face up.
Black - A cavalry unit arrives at the table edge.
White - A cavalry unit moves on to the table
Colours - no arrival but can be played normally on on table units.
Arrivals were placed on table before normal movement.

For a competent general (so 3 cards per turn) this should generate approx one unit per turn but it could be none, two or three. Once all units had arrived cards were dealt face down as normal.

Roman march column:
Roman units arrive on the road in a one wide column with one MU distance between them. Units in this formation may be moved as a group. Move distance over good going is increased to 4 MU. Once within 6 MU of an enemy unit they must convert to a normal formation ASAP. Treated a flank charged if attacked in march column. Roman foot must enter the table edge on the road but do not have to stay on it.

Roman rearguard cavalry arrival:
In the test game they were allowed to arrive once all the Roman infantry were on table. This actually proved too slow so we thought they should be allowed to arrive on turn Two in future games as they historically left the road and sped forward to reinforce the heavily engaged Roman vanguard cavalry.

Because the arrival of the Gothic cavalry was a bit delayed the deciding factor was the titanic infantry battle in the centre.

The action started with the Gothic infantry deployed behind the ridge on their side of the table with only a few archers and skirmishes visible to the Roman vanguard cavalry.

The game started with only the Roman forward cavalry units and some auxilia in march columns on the road on table.

The Scutari heavy cavalry and a unit of horses are front-left for the Romans, advancing confidently on a vulnerable looking unit of foot archers, little suspecting that they were actually a skull-rolling machine that went on to shoot them up on the approach then break them in the impact. A unit of Equites is on the right whilst the first two units of auxiliaries are in column of march on the road. 

The Roman Scutari attacked the exposed Gothic foot archers but were badly shot up as the main Gothic battle line appeared over the ridge.

Over the next three turns the Roman foot raced to deploy as the Goths closed the distance between them. The Gothic cavalry started to arrive on the Roman left flank but only the Alan's and Huns appeared which allowed the Romans some more time to deploy their infantry.

The start of Turn 4. Two units of auxiliaries have deployed off the road whilst the first two of four units of legionaries are marching across to form a second line. With the Scutari being shot up then broken in melee by the Gothic foot archers, the horse archers were feeling a bit exposed as the Alans and Huns closed in on them. However the surviving Equites are completing their move across the front of the the infantry to come to their support whilst the rearguard cavalry are coming up fast on the left. 

Turn 6. The Roman's first line with only two auxilia is already under pressure but Fritigern's dismounted bodyguard took a battering from the initial volleys of darts and the three legions and another auxilia have completed their moves to form a second line, leaving the superior legion, still in column of march, to the rear.

Turn 6, the cavalry. The Roman Equites Sagittarii had evaporated under the arrows of the Alans and Huns and a move by a unit of equites to push back Alans led to them taking a battering too. The Huns were busy getting themselves out of the way whilst the Roman Catphracts and the Equites, who had started off on the right flank, moved up.

Both the Roman rearguard cavalry and the Gothic horse arrived at a similar time to each other and clashed in the centre of the table. The outnumbered Roman cavalry attempting to hold up the superior numbers of Goths while the legions and auxilia confronted the main Gothic battle line.

Turn 7. The right hand auxilia is close to breaking and a legion moves up in support - too close as it turned out and they had to take a KAB test when the auxilia inevitably broke. The legions on the right were doing better, chewing their way through two larger units of Goth infantry.

Turn 9, I think. The two Roman legions on the right have broken the two Gothic infantry units and advanced in pursuit but lost three bases in the process whilst more fresh Goths are bearing down on them. The right hand auxilia is close to breaking and a legion moves up in support - too close as it turned out and they had to take a KAB test when the auxilia inevitably broke. The cavalry battle on the left is at a critical point. The left hand Equites broke in melee with the lead Gothic heavy cavalry but the Cataphracts also charged into the front of the Goths, doing better in the impact, and have expanded out. The last unit of normal Equites have charged into the foot archers and also expanded out in the melee. 

Turn 10. The two Roman auxilia have broken but the Gothic infantry centre has taken heavy losses and the survivors are facing two fresh legions. The Roman Cataphracts have broken the Gothic cavalry and their pursuit has taken them behind the flank of the other two units of Gothic heavy cavalry and are about to turn in for a flank charge. The Roman Equites, with their general leading from the front (all his other units had been destroyed so there wasn't much to lose!) are about to break the Gothic foot archers and, with that, narrowly win the race to reach the opposing army's break point.

The end. A much thinned-out table, with boxes full of casualties for both sides. It was a thoroughly enjoyable game and I'm looking forward to my next game of MeG and, having learnt from my mistakes in this game, finding a whole lot of new ones to make. 

Overall, I thought it worked well as a game and a simulation. The only thing we didn't really resolve was whether to create some kind of special rule to make the Roman cavalry attack impetuously at the start of the game as in the real battle. In the test game we forced them to advance at full speed and attack the nearest Goth unit then after that as the player wished.

I think it would work well either as a two hander or a four player game. Hopefully we can have another test game before the games day and I might even build some special scenery.


Friday, 29 October 2021

Vehicles - a learning experience!


My earlier WW2 vehicles were painted with lots of dry brushing and, for the British ones, using a olive green mixed by eye. Unfortunately this meant I had little confidence I could mix the same colour again and even within the earlier ones I have a lot of variation. Looking at those models now, I am not really satisfied with the effect. I would like to achieve a cleaner and more uniform appearance, as well as a more realistic (and repeatable) match for SCC15.

My first thought, having relied on the painting tutorials on the Crac des Chevaliers blog for my infantry was to continue with the "clean style" for vehicles. Although the results on there look great, when I made  a test I wasn't really happy with either my execution and thought it was a bit too clean on the larger canvas of a tank. Later vehicles on CdC are painted by airbrush with a panel high lighting style which I think I prefer. Although I have owned an airbrush for a few years, purchased to paint my 1:1250 / 1:1200 waterline ship models, I have never really learnt to use it for more than laying down a single uniform coat. With my wargames painting focussing on Italian Wars French and then Late Romans, there was little call for airbrushing! However I came across some great tutorials by Rubén Torregrosa on his HeresyBrush blog, applying this technique to 1:144 tanks so thought I'd give it a go.

I had some vehicles part complete by the dry-brush method but looking closely at these, the assembly wasn't that great and some detail was already obscured by the paint so I decided to strip them back to bare metal. I used a cheap paint stripper from Wilco, which worked well, followed up with a soak in Fairy Ultra and good scrub with a stiff nylon brush and a lighter brush with a brass wire brush to really clean up the surface. The brushes were from a set of 3, also from Wilco, for the bargain price of £1.00 - I'm not sure what I'll do with the miniature steel wire brush but it may come in handy for DIY.

To hold the vehicles for spraying, I attached short sections on dowel to the undersides and appropriate drilled holes in a piece of wood to hold them for drying. The Daimler AC turrets already had their magnets glued on so I just put them on top of round nails, relying on the strong magnet to hold them firmly enough.

I should at this point give a little shout out for a small model and paint shop near me in Coventry: the Paint Rack. I wanted to get the Mig Ammo filters and washes recommended on Heresy Brush and, after recent disappointing results with mat varnish, the Mig Ammo Ultra-Matt varnish that Chevalier de la Terre suggested. The paint rack was able to supply these as well as such much needed advise on airbrushing the primer and varnish.

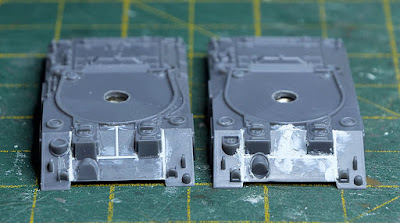
I started with an airbrushed primer coat using Mig Ammo One Shot black. In hidsight, I think black was maybe a mistake as it was difficulty to see where the dark base coat was covering it - I'll probably use grey next time.

My SCC15 is a 50-50 of Vallejo Model Color 888 Olive Grey and 924 Russian Uniform. I started with a base of 50% SCC15 with 50% black then SCC15 applied from above and at 45° then a first highlight of three parts SCC15 to one part buff and final highlight of 50-50 SCC15 and buff. I picked out small details and some edges with a fine brush and painted details like tools and stowage normally.

The tutorial suggested Vallejo 304 Track Primer, appropriately enough, for the tracks. I didn't have that and figured any medium grey-brown would be OK so used a 50-50 mix of Olive Brown and Medium Grey.


With the painting done, I was looking forward to applying the decals then filters and washes to bring the whole thing together and add definition. To provide a smooth surface for the decals, I brushed on some Tamiya gloss varnish locally where the markings would go and over exposed details to provide a bit of extra protection. This was a huge mistake. The Tamiya varnish reacted with the Vallejo paint to produce a bubby, smeared mess and I didn't realise until I had done the last part of the last vehicle. 

So rather than a series of finished photos, here they are back in the paint stripper.


As a late addition, adding insult to injury, the paint stripper has turned the black primer into a tar-like goo that is insoluble in everything I’ve tried so far.

We (hopefully), learn from our mistakes and this is certainly providing a lot of learning opportunities!


Thursday, 14 October 2021

15mm WW2 German Company HQ and another platoon.

As I've previously written, I started my WW2 15mm collection back in the early 1990s. I'd like to think my painting has improved since then but I didn't want to discard the effort I'd put into painting those earlier figures so my plan was to do a minimal update to blend them in with newly painted figures as I expended and re-based my collection to suit new rules.  However the reality was that my colours then were so far off that most details needed re-doing and even the uniform shadow colour was a poor match so by the time I'd given them a wash of Army Painter strong tone, new mid-tones and highlights for the uniforms and all the details repainted, I don't think I saved any time at all. 

The officer, panzerfaust team and a few others are painted from bare metal whilst others, including the riflemen in the three squads are the refurbs. It should be obvious which was which from the faces. All the figures are from PeterPig.

The new figures, including the panzerfaust team above, were painted and varnished after the refurbed figures and didn't suffer the satin varnish drama of my previous German platoon. Although there is a bit of sheen in the photos, this isn't apparent on the models.

With two platoons done and a third well along, I thought I thought I'd better get a company command base done. As with my British infantry, this is three figures, including a radio, on a 30 mm square base.


I've tried various materials to represent aerials. Bristles from brushes - relatively in-scale but too fragile and too much variation. Very fine piano wire - too many puncture wounds and too much blood dripped onto the miniatures. I did briefly consider cat's whiskers but he is now hiding under the spare bed so this one uses fishing line. It looks way over-scale and a bit curved but it should be tough and safe.


I'm now most of the way through another platoon. After that I plan to do a couple of MG42s on tripods then I'll be back to the British 4 KSLI for another company and the carrier platoon. 5 platoons down, only another 11 to go, plus vehicles!

Wednesday, 29 September 2021

First German Platoon


For this first platoon, I used all new figures and tried to follow the clean painting style and colour choices on the excellent Crac des Chevaliers blog.

I'm pleased with the result and it is certainly an improvement on my earlier WW2 Germans, painted with lots of dry brushing and with a far too blue field grey, but inevitably it falls a bit short of what I was aiming for. Not quite as clean as I wanted and the varnish has gone satin - not sufficiently mat varnish really is my Achilles heel! 

These took quite a long time. A combination of  trying to follow somebody else’s methods and a strictly defined colour scheme with much less space for making it up as you go compared with my Romans or Italian Wars collection. Ah well - practice makes perfect.


One issue from using a single base for a section, including the LMG team is that you can’t really use prone figures firing a bipod MG42 mixed with upright figures. It looks ok with advancing figures, as below, but I’m not 100% convinced by the standing firing figures. 


I especially pity the loader here, being used as a rest for the MG42. Really hope he has some good ear plugs!