I have just made myself a new war-games board to fit over the dining table and bought one of the excellent Mat O’ War cloths from Antenocities Workshop http://www.antenocitisworkshop.com/mat-o-war-green-2m-x-1-25m.html and wanted to upgrade my scenery to match the mat, my basing colours and be compatible with the rather prescriptive rules of Field of Glory Renaissance.
I already had some hills that could be re-surfaced and plenty of hedges and trees so my main requirement was for the various types of flat area terrain: woods, broken ground, brush, fields, vineyards, plantations, etc. I looked at the ready made scenery from Miniature World Maker - I liked the way this lay flat on any surface and its durability but it seemed expensive and wasn’t a very good colour match for what I wanted so I decided on the home made approach.
Antenocities recommended a particular static grass as a good match for their green Mat O’War so I had ordered a couple of packs of that but when they arrived they seemed too bright. Luckily I already had a bag of darker and duller static grass which I had been using, dry-brushed with yellow ochre to lighten and high-light, for basing my Italian Wars army. This mixed in to give a much closer match and plenty for my needs.
The first question was what to use as a base material. I wanted something flexible, tough, not too thick but heavy enough to lie flat and not move about. Many years ago I acquired some green and grown carpet tiles to use as a playing surface and give a patchwork field effect for 1/300 scale WW2 (you could get away with simpler scenery in the 80s!). After pulling the felt-like covering off and singing the last fibres off, wire brushing and sanding the surface of the rubber-base, I was left with just the type of base I wanted. These were only one foot square and It would be great to get some slightly bigger pieces but all the modern tiles I have seen so far have the carpet surface too deeply embedded in the rubber.
I decided to just use the same basic technique and colour scheme that I use for figure bases. A base of sand, glued on with PVA. A base coat of dark earth then dry brushed first with yellow ochre then a couple of progressively lighter yellow ochre and white. The static grass is then glued on with more PVA, followed by any tufts. Instead of my usual Humbrol matt dark earth for the base colour, I bought a brown emulsion match pot and mixed in some other acrylics to get a fairly close colour match. I should have just got a litre of Dulux mixed to match a colour swatch - I’ll have to do that anyway as the first pot has almost run-out now.
The first thing was to make some general purpose irregular terrain areas that could serve as woods, broken ground or brush with different types of add-on features. The rubber cuts easily with a craft knife then it was just a matter of applying the fine sand, painting and glueing on the static grass.
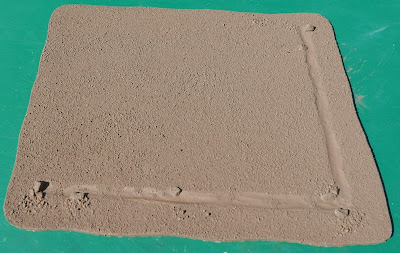
Next on this list was some straight-sided pieces as fields, plantations and vineyards. I wanted to put some more detail into these, sacrificing flexibility of use. One advantage of the fairly thick (about 3mm) base, is that features can be carved into the surface so I cut shallow trenches along some parts of the sides to indicate ditches. I left a wide enough space around the edges to take the hedges I already had so I could distinguish between open and closed fields.
I wanted a ploughed effect on some field sections so spread decorator’s caulk over the surface and used a piece of card with a serrated profile cut in the edge to drag across creating the furrows. I also used a coarse brush to create tracks between field sections. For the fields, I added a few small rocks and grit around the edges to add interest.
After the usual painting I used dark washes to deepen the ditches and added dark green 6 mm tufts to represent reeds and unusually lush grass in the arid Italian countryside. I considered using a proper water effect but was worried that might crack and settled on a couple of coats of gloss varnish - over such a small and thin area I think the effect is just about OK. I only applied static grass around the edges to blend in with the Mat O’War.
I wanted part-grown crops along the tops of ploughed areas. I imagined this would be easy - brush across with PVA which would only catch on the high points then scatter on finely minced clumping foliage. That didn’t work at all. After some more trial and error, the best result was a couple of cycles of painting along the furrows with PVA and covering with a fairly fine turf mix.
 |
| Even with painting the tops with PVA, clumping foliage didn’t give very clear definition. |
 |
| Foam particle turf mix worked better, I think. |
 |
| This empty field shows how the hedges fit on to make it an enclosed field. My plan is that this could also be used as a plantation or vineyard (the vines are a story for another day). |


