Friday, 6 October 2023

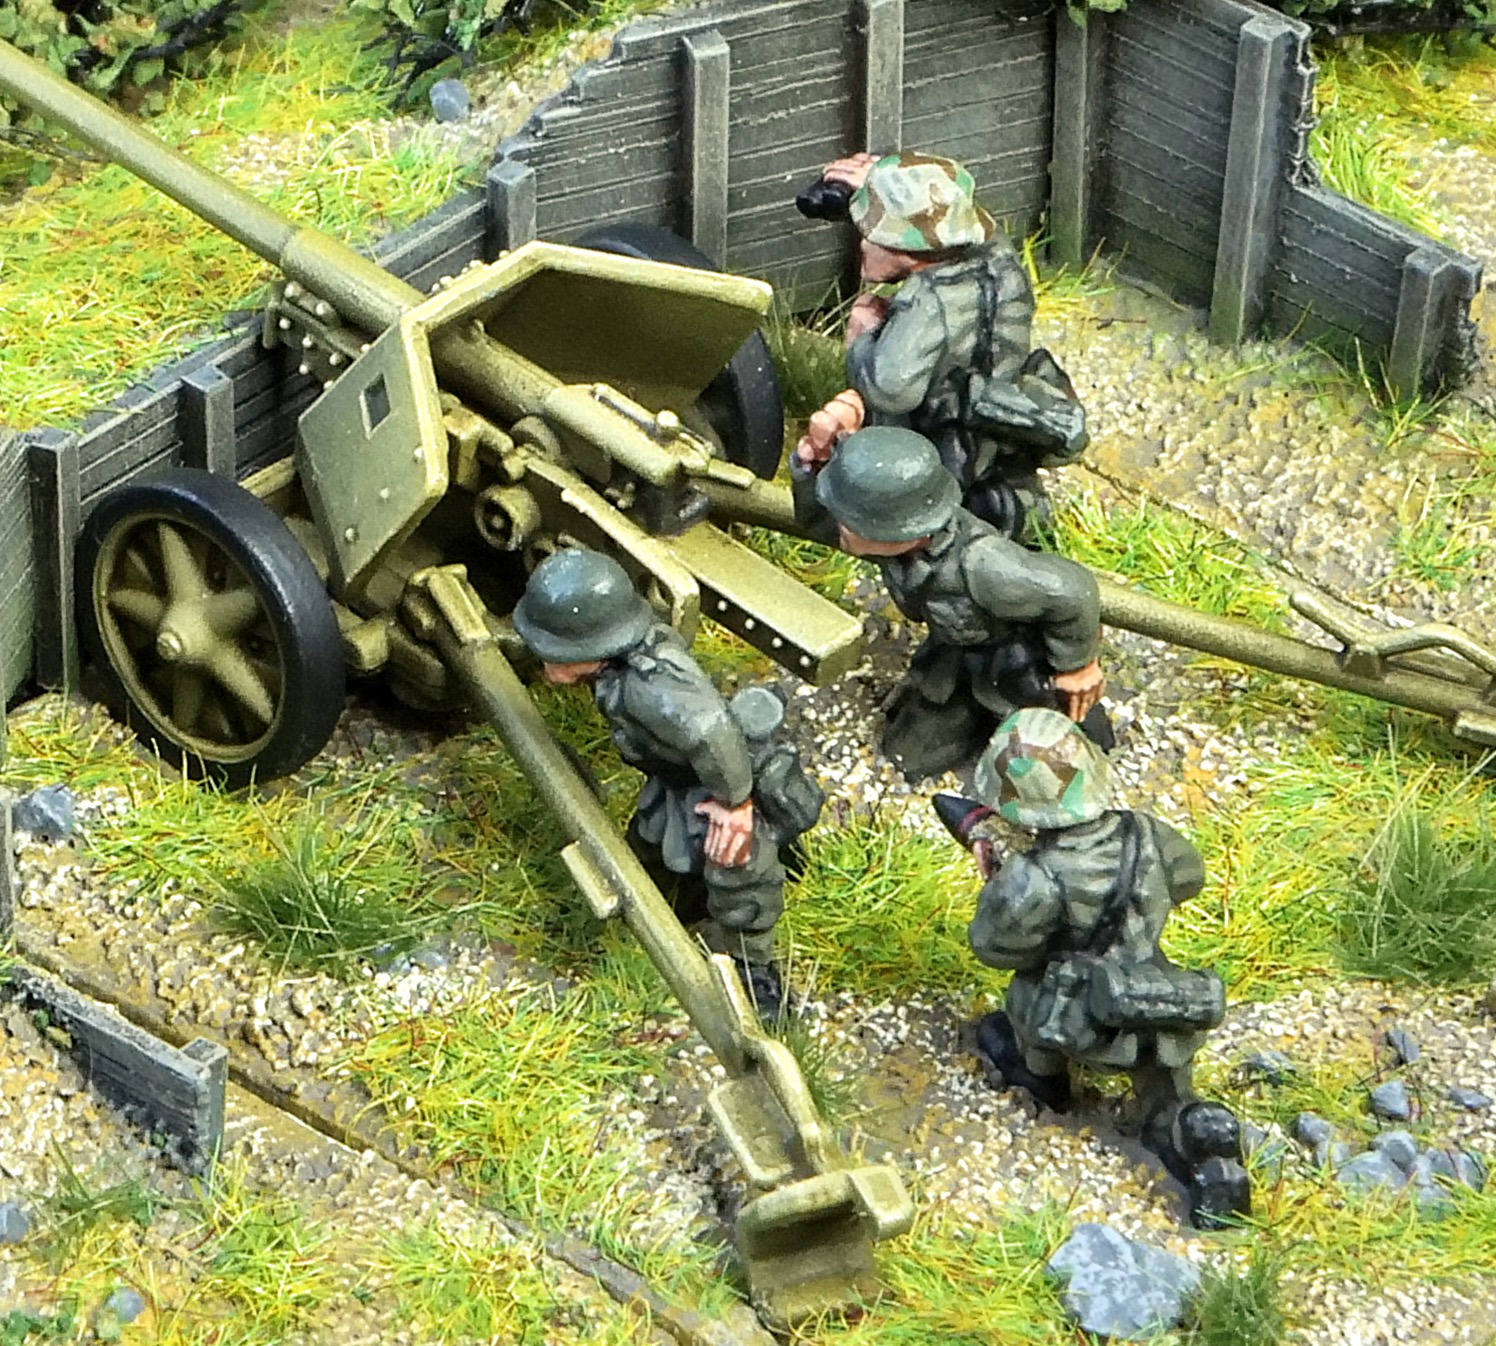
German Pak 40 and field fortification.


These have been a lot of work and cost just to put two guns on the table!

I already had a Peter Pig Pak 40 painted to my older style and basing scheme but wanted at least two guns with tows and, whilst I was placing an order with PSC in their sale saw that they had a box of 4 guns that could be assembled as Pak 40 or Pak 38 along with the appealingly eccentric looking Raupenschlepper tractors for considerably less than it would have cost for another Peter Pig gun, a bag of crew and a couple of Sd.Kfz. 10s from Skytrex so I added them to the order without much thought. I later realised that the Raupenschlepper wasn't much used in Normandy and the supplied crews were rather flat so I ended up buying a bag of Peter Pig gun crew anyway and, later, a couple of Sd.Kfz. 10s off Ebay. The PSC Pak 40s are very nice but I'm not sure what I'll do with the Raupenschlepper tractors or the spare couple of sprues.

Another issue was what size base to use, as none of my existing sizes were suitable - the usual squad base at 30x50 fitted lengthways but would have required a very narrow trail leg angle. I initially tried 50mm square but that had a lot of empty space and had a knock-on effect for the emplacement so I eventually settled on 40 wide by 50 deep as a compromise.

I thought it would be nice to have some dug in emplacements for the guns. This brings up the usual problem for more modern periods of not being able to dig in to a plywood table so we are left with trying to create a terrain piece to place on top of the table that gives some sense of an excavated position.

I started with 2mm mdf, made the inner-face of the dugout from card and built up the front from layers of mdf, glued together. I had the front corners of my dugout overlap the gun bases slightly which took a bit of fiddling about to get right.

I added some detail of posts and planks from plasticard and plastic rod then smoothed the outer slopes with repair plaster.

I used my usual basing scheme and added bushes from rubberised horse hair, sprayed black, dry-brushed with browns and with the 'leaves' made from cork granules coloured with green acrylic paint. On the latter point, a big thank you to John Boadle of the excellent Hand Built History blog for kindly giving me a big milk carton full of cork granules and explaining the process he uses for trees and hedges.

The Pak 40 bases fit in well - as I mentioned, the front edge and corners disappear under the "wooden" bank reinforcements.


Next on the table is a project to make new hedges and I'll use the same cork granules, in a couple of different colour mixes, for those so the idea is that these will match in. I'm also going to do some smaller dug-in positions for machine guns and the British 6 pdr guns. These will be of a more hastily prepared design, as a contrast to these which have obviously been prepared some time in advance of the battle.


Sunday, 13 August 2023

Basing scheme


After a comment asking about what basing recipe I used, I thought it might be interesting to do a more detailed step by step post on basing.

I first used this scheme for my Italian Wars French army and the idea was to give a sense of Southern European ground - slightly sun-bleached rocky soil with patches of different grasses. I also think a paler basing scheme makes the figures stand out better. I used the same scheme for my terrain and that rather committed me to keep using it for other armies. Not a bad choice for my Late Romans to inherit but maybe less suitable for Normandy! 

Another objective was to be a reasonable match for my table. I bought my terrain mat some years ago from Antenocitis Workshop. It was called “Mat O War” and is a sort of very stiff synthetic felt - no chance of getting it to drape over hills! They told me they got them from Ireland and that it was made by compressing (presumably with some heat) the type of fibres used for static grass. They did two versions, a pale sand and the multi-tone green that I bought. The bad news is that I don't think it is available any more - in fact the Antenocities website no-longer seems to exist. 

The mat was an exact (as far as I can tell) match for their “DECORPLUS 2mm Gamer Grass Mix” and I originally used that for basing - the Kallistra static grass I use now is brighter, a single colour and more green so I dry brush a bit of yellow ochre to tone it down so the figure bases and scenery still match fairly well with the mat. 

As a final step, in preparing the figures for basing, I paint the cast figure's base with my base earth colour. This means I don't have to texture and paint right up to their feet when they are glued to the element base so makes the process a little easier.


My bases are 2mm laser cut MDF from Minibits or WarBases with self-adhesive 0.8mm magnetic sheet from Magnetic Displays. I stick the MDF base on the whole magnetic sheet, cut it off with a bit of excess then trim the magnetic sheet more closely with a sharp knife before sanding the edges to give a more or less seamless finish. Recently I've also been giving the underside a dusting of Halfords white primer to give a nice clean base for the unit name labels - also, for those without labels, it makes them less prone to sliding off hills.


I attach the figures with neat PVA adhesive. When that is dry, I fill in around the bases with a water-based filler. A coating of watered down PVA helps this adhere and I use a wet (old) brush to push the filler into place.

Next I paint the base with slightly diluted PVA, add a few small bits of rock and rounded sand grains (around 1mm) then sprinkle with fine sand, shaking off the excess immediately. When the PVA is dry, I brush off the bits that haven't fully adhered. I take particular care that there is nothing stuck around the edges.


Originally I used Humbrol Dark Earth as the base colour but I wanted to use the same mix for scenery and that would have been rather expensive so I bought a big tub of discontinued brown emulsion from B&Q. The colour isn't much like the Humbrol but that doesn't seem to matter to the final look. Being water based, it doesn't wet the textured surface as well as enamel paint diluted with white spirit so I usually need to do some touching up once the first coat is dry. There are usually a few bits of sand stuck by the emulsion around the edges so I remove those at this stage.

Dry brush acrylic yellow ochre, fairly heavily then more lightly with yellow ochre + white. Around the edges, I try to get an effect of vertical streaks rather than a simple dry-brushing and finish them off with some pale olive green - a match pot of emulsion. I find this helps the bases disappear into the terrain cloth and disguises the height of the base somewhat.

The larger rocks are painted with Vallejo London Grey then dry-brushed with Pale Grey. No real logic to this but it makes them stand out nicely. Although I try to be as neat as possible with all this, invariable a stray bit of basing paint gets on one or two figures, requiring some touching up.


The tufts are MiniNature 737-22 and the static grass is "Spring Meadow Flock" from Kallistra. As mentioned above, I dry brush over the Kallistra grass with yellow ochre to tone it down a bit.


Wednesday, 8 March 2023

Army box labels


With a growing number of Really Useful Boxes full of figures and vehicles, I thought some sort of labelling would be a good idea to avoid having to open each in turn to see what was inside.

Rather than just having text labels, I wanted some pictures. It was easy enough to find images on the web that would be suitable for the Romans, Italian Wars French and 11th Armoured Division but the WW2 Germans were a bit more difficult - I certainly didn't want boxes with Swastikas on the side but nothing else seemed to have sufficient immediate impact and recognisability. In the end, I went for a plain German cross against a 3 colour camouflage - as seen on the sides of vehicles. After a bit of searching, I found a suitable image which I cropped and edited to make sure the colours were bright and distinct then superimposed the cross.

Tuesday, 7 March 2023

More Late Roman skirmishing bowmen - Sagittarii Venatores expanded to 9 bases.


Back in September 2020, I completed a unit of Late Roman skirmishing bowment, the Sagittarii Venatores. https://smallitalianwars.blogspot.com/2020/09/late-roman-skirmishing-bowmen.html At that time I only painted 12 figures for 6 bases but Mortem et Gloriam has skirmishers deployed 3 bases deep and 6 is rather a small unit so I have found myself borrowing figures for each game to make up the numbers to 9 bases. 

As a break from Khaki and Field Grey, I've painted 6 more figures to complete the unit. At some point I'll probably do a couple more bases of horse archers, for the same reason. 


Monday, 20 February 2023

4 KSLI Platoon 12, an 'O' Group Battalion and Support


The 15 figures of Platoon 12 completes my 4th King's Shropshire Light Infantry, B Company in 'O' Group terms. All the figures are from Peter Pig.

It also means I now have the basics of an 'O' Group British battalion plus some supports, albeit one of the companies, the mortar FOO, 6 pdr guns and two Vickers MMGs using bases that I painted years ago for 'Overlord' rules). The Daimler Dingo is also an old one and doesn't match the painting style of the other vehicles (or have the correct markings). 


Next on the list for the British are the carrier platoon, new bases for the FOO, MMGs and 6 pdrs and Lloyd Carriers as anti tank gun tows. Replacing that third company with new bases is well off to the right of my schedule.

Before that though, I need to paint some more Germans - infantry, PaK 40s and their tows. 


Sunday, 1 January 2023

Daimler Armoured Cars and Churchill AVRE in 15mm

These models are something of an indulgence, painted when I should have been working on more infantry platoons. They aren't needed for the core of my 'O' Group forces but are models that I've wanted to have for a long time. 

They were bought with half an eye to possible scenarios. In the case of the Daimlers, I imagine them, with a couple of Dingos and maybe a carrier platoon, seizing an undefended bridge and then trying to hold it against piecemeal German attacks as both sides frantically try to feed in reinforcements. For the AVRE it would be simpler - provide an option to blow up some obstacle or fortification. 

At the start of my career, I worked for Jaguar Cars at their Radford engine plant - or 'the Daimler' as it was locally known so I felt I had a bit of a connection to the Daimler Armoured Car (and the Dingo) and there is a good example in the Coventry Transport Museum. https://transport-museum.com/visiting/daimler-armoured-car.aspx

My two models (from Skytrex's Command Decision range) are painted as belonging to the Inns of Court 'The Devil's Own' armoured car regiment. Originally a corps-level asset, elements of the regiment landed early on D-Day, on Juno beach, and were given a special mission of penetrating inland with attached engineer units to block German reinforcements from crossing the Orne by demolishing bridges. They spent the rest of the Normandy campaign scouting for 11th Armoured Division and were eventually allocated formally as division troops. My rather limited markings are meant to represent them after this so would be incorrect for most of the Normandy battle.

The division symbol is a new Skytrex decal whilst the 44 of an armoured car regiment is a much older decal that I over-painted because the colours and definition were so poor.

The AVRE is painted as belonging to the 6th Assault Regiment of 79th Armoured Division. The division emblem and star are from Skytrex and the blue arm of service rectangle is hand painted.


Sunday, 4 December 2022

More Shermans - B Squadron, 3 RTR Complete

These three PSC 15mm Shermans and Peter Pig tank commander complete my scaled down squadron of three troops of three tanks each plus an extra 75mm Sherman to represent the squadron HQ. I have a couple of PSC models left over and one Skytrex Sherman V painted in my earlier dry-brushing style. I'll probably complete these at some point to replace the bodged hybrid PSC/Skytrex model or give a fourth troop but that's a very low priority.

As I post this, I realise I have missed off the aerials, although the holes or all drilled ready so I'll have to add those at some point. 


The painting technique is the same as with the previous ones - airbrushed with successively lighter shades of SCC15 with exaggerated contrasts and the details and final hi-lights by brush then brought together with a filter and pin wash, as described by RubĂ©n Torregrosa on his Heresy Brush blog. However I skipped the chipping, streaking and mud stages as I wanted a cleaner look and feel that, at this small scale, it is easy to lose the detail and even the overall look of the vehicle. 

Another difference was that I used Vallejo paints, with a base SCC15 mix of 1 part 888 Olive Grey to 1 part 924 Russian Uniform. My shade colour was the 1 part SCC15 mix to 1 part black and the airbrushed first hi-light 3 parts SCC15 to 1 part 976 Buff. The top (brushed) hi-light was roughly 1 part SCC15 to 1 part buff. 


With a growing collection of vehicles finished, I needed somewhere to store them. My infantry are in the ubiquitous Really Useful Boxes, 4 litre size with two shallow MDF trays from Warbases. to save space. All my infantry bases are magnetised but I prefer vehicles, at least the larger ones, un-based needed some other solution to stop them moving about and getting damaged. My solution was to buy some 20mm upholstery foam from Dunelm. One £5 piece is enough for three boxes, which should be plenty for all my WW2 vehicle storage. I marked it up with a soft pencil and made the cuts with a new craft knife blade. 

Actually 20mm was too thick - 1/2" or 15mm would have been perfect - but, despite looking for a long time, it was the best I could find without buying huge quantities. The main problem is that the gun barrels on tanks like the Firefly, that overhang the hull, sit lower than 20mm off the ground. My rather awkward solution was to cut the cutouts in half across their depth.