Sunday, 27 June 2021

More Late Roman Sub-generals


These two additional sub-generals are the final elements I needed to field a 10,000pt army for Mortem et Gloriam. 

I wanted to have all three horses in each group with the same gait - either walking or galloping and with all the horses different.

As before, the quality level of the general is shown by the shield colour - the MeG standards of red for 'Legendary', yellow for 'Talented', green for 'Competent' and white for 'Mediocre'. For the army commander and first sub-general, I used a rare earth magnet glued into the base and made the shields out of washers. That gave a really strong attractive force - so strong that the snap as the magnet grabs the washer risked chipping the paint! For these I used the same rare earth magnets but made the shields from a circle of plasticard, backed with steel paper and the dome and boss made from Milliput. This gives a weaker attraction but I think it will still be enough and it is much easier to swap the shields around as needed.

In common with my Late Roman army commander and previous sub-general, the guards have the shield pattern of the Scola Scutariorum Secunda.

The first sub-general is a Gladiator Games rider from their armoured cavalry command group on a Minifigs Byzantine half-armoured horse. Strangely, for a commander of cataphracts or clibanarii, he was modelled with knee-length breeches and open-toed sandals so I covered his legs and feet with a bit of Milliput to give him trousers and shoes / late Roman military sandals. 


The vexillum bearer is a Minifigs heavy cavalryman mounted on a spare horse of unknown origin. I made the vexillum from soldering two pieces of brass rod the glueing on a piece of aluminium foil and a circle of plastic. The design is hand painted and based on a surviving 3rd century vexillum from Egypt, depicted in the Osprey book 'Roman Standards & Standard-Bearers (2)'. For the earlier sub-general's vexillum, I used metallic paint but I found that quite hard to control and achieve the depth and subtlety of tone that I wanted so used shades of brown-yellow this time. I think I prefer the non-metallic metal style for standards.


The vexillum bearer for the second, galloping, group is a Minifigs figure on an Asgard horse. Again the vexillum design is based on one in the Osprey book, with the inscription 'soli invicto' - the unconquered sun.

The vexillum bearer's shield was much smaller than the other heavy cavalry figures. I'd used one of these figures before (Heavy Cavalry: Equites Honoriani Taifali Iuniores) and let it go but afterwards regretted it as it stood out a bit compared to the rest of the unit. This time I made a new shield from plasticard and Milliput. The figure was cast with a mail coat and bare arms but the definition on the mail was very soft and looked quite different to the two Asgard figures so I smoothed it right off and used more Miliput to add sleeves for an un-armoured look.


The sub-general is an Asgard cavalry officer with a spear replacing his mace. The horse is Minifigs - I had two like this but have no idea what pack they came in. His shield is based on a pattern of unknown colour (taken from carved ivory showing 4th/5th C guardsmen) in the old WRG Armies and Enemies book. I chose the colours to pick up on the unconquered sun theme. 

The escorting heavy cavalryman is an Asgard rider and horse, unmodified apart from replacing the cast spear with brass rod and making a new shield boss to match the smaller ones of the other vexillum bearers and guards.


Although I have a few additions and alternatives still to complete, now I have a usable Late Roman army, I'm going to have a break from Romans and switch over to painting WW2 models and making scenery for a while.

Tuesday, 25 May 2021

Celtae Seniores - Auxilium Palatinum


My sixth and last infantry unit for my Late Romans. As with my previous unit, these are Legio Heroica figures with Little Big Men shield transfers. 


Just two more sub-generals to fill that space at the top right in the picture below to have a usable 10,000 pt army for Mortem et Gloriam.


Friday, 2 April 2021

Tubantes, Auxilium Palatinum (or Leones Iuniores?)

With this unit, (and a sister unit still to be completed) my 4th C Romans enter the modern Wargames world with figures from Legio Heroica and the ubiquitous Little Big Men shield transfers.

Unlike my old Minifigs / Asgard / Gladiator legionaries and auxiliaries, these are actually dressed and equipped according to the current accepted view of the late Roman 'pedes'. The figures are cleanly cast with little flash and good definition and there are a variety of (similar) poses and equipment. The print quality of the transfers is excellent and they are easily applied - the only small niggles are that the centre hole isn't quite big enough for the cast boss on the shields and the outside shape doesn't always match the shields very well but the latter, I think, is down to casting variation of the shields.

These Legio Heroica figures are significantly bigger than the older models and the shields are much bigger. The wire spears are the same length (about 22mm) as those I gave to my Minifigs auxiliaries but quite a lot longer than the cast spears of the Minifigs legionaries, a difference that is increased by being held some way off the ground whereas the legionaries have theirs grounded. 

The figures come with separate steel spears with a needle-like conical point but I replaced these with my usual 0.7mm brass rod flattened and shaped to give a leaf-shaped point. Because the figures are cast open-handed there was none of the tedious drilling out hands and cutting away cast-spears but I still had to do quite a lot of shaping to deepen the grip and even moulding the epoxy glue to get a secure attachment and so it looked like the fingers were wrapped around the shaft rather than it just resting against the open palm of  a hand with unnaturally short fingers. A lot of figures also seem to be a bit lacking in thumbs and a few had badly moulded right hands that needed more reconstruction with Milliput.

Shields are cast separately and in two slightly different sized variants. They are rather thick at 1.1 mm - about 100 mm at full size. I expected this to look really bad but once painted the excessive thickness doesn't look too abvious. I wasn't sure whether to glue them on before or after painting. In the end I decided after to improve access for painting and make applying the transfers easier but that inevitably means I wasted time painting features that will be hidden and have a glue-bond that is only as strong as the weakest layer of paint. 

In theory it is only necessary to paint the centre of the shield boss and the outer rim to match the transfer colours - I found Vallejo Dark Vermillion a close match - but I chose to paint over all the red on the shields to get a similar look to my other hand painted shields. I also gave a few of the shields steel coloured bosses for a bit of variety.


Objectively these are much better figures than the old 1980s ranges based on now-discredited WRG interpretations of equipment but somehow I have slightly mixed feelings about the completed unit. The original point of this army was to make constructive use of figures I'd originally bought with my pocket money in the 80s and never completed. But it also became an exercise in nostalgia and seeing what I could do with old-style basic figures. I was always going to have to buy extra figures for two complete infantry units (as well as a few extras to fill out others) and I thought it would be daft to deliberately buy old, inaccurate figures lacking in detail and with increasing quality problems from tired moulds and masters. Now I feel a bit like I've cheated with these modern figures and they look too different to the rest of the army.

Added on 3 April

After posting some pictures from this post on TMP, one of the comments hi-lighted that there are actually some interesting doubts about which unit this shield pattern should be attributed to. To explain this, I can't do better than quote Colonel Chabert's post:

Concerning the attribution of this particular shield pattern to the Tubantes, Luke Ueda-Sarson has done a lot of analysis of the shield patterns in the Notitia Dignitatum and his conclusion is that there are blocks of shields where the labels (i.e. the unit names) are now out of sync with the patterns. Considering that the copies of the ND we have today are at least 4th generation (Original – Carolingian copy – Codex Spirensis – Current copies) it is entirely possible that such errors may have crept in. One of the blocks concerned is the section of the western infantry units where the Tubantes are found. If L U-S is right, and I think he is, then this shield pattern belongs not to the Tubantes but to the Leones Iuniores. The actual shield pattern of the Tubantes would then be the one ascribed to the following unit, the Salii. These two units were brigaded together as was the common practice for all Palatine regiments. They are both named after tribes of the Frankish confederation. There is also a Tubantes-Salii pair in the Eastern army listing. Interestingly, neither pair has the Seniores/iuniores suffix which was used to differentiate regiments with the same name where, probably, the elder one had given up a cadre to form a second new regiment.
As far as the Leones Iuniores are concerned, they are listed immediately after the Leones Seniores, suggesting that they were both formed at the same time and brigaded together (an unusual but not unique occurrence for Seniores/Iuniores pairs). However Hoffmann proposed that the original Leones (the Seniores) had been brigaded with the Excultatores so where that leaves the Leones Iuniores is anyone's guess.
L U-S's full analysis can be found here: link
Warning: his site has so much fascinating stuff that once you enter you may never leave again so beware!

Cordialement

Le Colonel

I'd seen the same issue picked up by Luke with the shield pattern for my skirmishing archers, the Sagittarii Venatores, so it is doubly embarrassing to have missed this one. 

Saturday, 6 March 2021

More Late Romans on Parade

Now I have finished* all the units using the old Asgard and Minifigs figures, I thought it would be a good time to take stock and have a look at what I have done so far. 

[* "Finished" if you don't count the extras I'm planning to give the legionary units the option of having eight bases and/or integral bowmen and some clibanarii with bows and half-armoured horses that I may complete two extra bases with my existing cataphracts. Finished enough for a usable army, anyway!]


In total I have painted 108 infantry, 58 mounted figures and a couple of wild boars since January 2019. Not exactly a lightning fast pace!

To make this a usable army, I need two more 6-base infantry units and at least one more sub-general.

For the infantry, I  have gone for modern Legio Heroica figures with LBMS shield transfers. I'm part way through the first unit and, thanks to their mail only needing a dry brush with gunmetal and the shield transfers rather than laboriously painting all that un-historical leather armour and having to hand paint all the shields, this should go fairly quickly. I've also got three bolt throwers - also Legio Heroica. 

I bought a couple of mounted command groups from Legio Heroica too. They are nice figures but they look so different to the rest of my cavalry and generals that I might just scour the spare figures box for another sub-general or two.

All in all, that gives me 52 more infantry and 3 or 6 more mounted to paint for a usable army. My target is to have this done ready for a game as soon as the rules allow in the summer.


Sunday, 28 February 2021

Late Roman Horse Archers - Equites Secundo Sagittarii


This is the last full unit to use up my old 1980s figures and the last cavalry unit for this army. 

The basic figure for the riders is an Asgard (later Table Top Games and now Alternative Armies' Isarus range) LRC1 Late Roman Horse Archer. As usual with figures of that vintage, there was only one variant so, to get more variety, I did a couple of head swaps from spare helmeted figures and made typical late Roman round hats for three more from Milliput. I'm not sure why they are all holding their bows in their right hands - unless they really are all left handed it seems an awkward way of doing things.

I modified the cloaks too - in some cases I just filed bits off but for others I made new folds from Milliput. It all adds to the variety and I think if the cloaks and heads are varied it looks less strange that there is only one pose.

One of the 8 had been damaged so I cut him off at the waist and replaced the top half with that from a G7 Goth Archer Advancing. It would have been good to have one or two more changed like this to a completely different pose but was such a fiddly job that I left it at just the one. I think the grey blob on the horses tail must be from a bit of plasticine that I used to hold the figure whilst the epoxy dried. It disappeared in the pre-painting detergent wash anyhow.

The other modification I made was the shields. The basic figure has a very small round shield with a textured sort of surface, a bit like those 1970s pub tables with a hammered copper top. I wanted to paint the shields with one of the designs attributed to Equites Sagittari in the Notitia Dignitatum so needed something a bit bigger with a boss. After early attempts at cutting or punching circles of plasticard, I requisitioned some small sequins from my wife's sewing supplies and used those. I roughed the surface up with sandpaper and made the shield bosses from Milliput. The sequins are thin (about 0.2 mm) but I guess that is actually more realistic than cast shields that scale to about 4" thick!

As with my other Late Roman mounted  units, the horses are a mix of Minifigs and Asgard and I accepted the odd mix of walking and galloping poses in the interest of variety. By this stage, I was really scraping the barrel for usable figures so had to make new tails for a couple of horses where the original cast tail snapped off in the the process of removing old, badly applied paint.

The white of the painted shield design is my standard off-white Vallejo sequence of Khaki Grey, Iraqi Sand and Ivory. I really like the warm effect this gives but in this case I think it was a mistake as being too close (or identical) to the white of most of the tunics and not enough of a contrast to the yellow of the shield rims. A grey or grey-blue sequence might have been a better choice.

The one thing I really wasn't happy about with this unit was the horse colours. I've been trying to get a bit more variety and some of these just haven't worked out well. I'll need to have a proper re-think of this before I tackle any more cavalry units but, as this is the last one for this army then Normandy 1944 is next in the queue, there is no urgency.


Friday, 26 February 2021

Late Roman sub-general


This command element is a real mix: a Gladiator Games one-piece casting for the general, a modified Minifigs heavy cavalryman carrying the vexillum and a Minifigs trumpeter on a horse I found in my scrap and spares box.

The original premise of this army was to make productive use of figures I had bought dating back to the 1980s. By this stage the leadpile is rather depleted and I'm having to either make do and mend or order new "old figures" in penny packets with prohibitively high postage costs, rather negating the original point. The vexillum bearer is a good example of this. I had a couple of Minifigs heavy cavalry where the hand holding the lance had broken off in clumsy attempts to drill through it back in the day. I repaired this by drilling into the arm, making a loop of thin steel wire (from a wire brush) to secure the vexillum shaft then making a new hand from Milliput. The hand is a bit too big and lacking in detail but doesn't look too obvious on the finished item. I soldered the cross-piece, made the vexillum from aluminium foil and the disc with a  slice from a circular piece of plastic.

To secure the shield on the ground (the colour denoting what category of commander), after some problems with the army general, I initially tried a piece of the flexible magnet that I use for bases but such a small piece didn't give a strong enough attractive force so I reverted to a rare earth magnet, even though these are too strong. I don't suppose I'll be swapping the shield colours round that much really.


I need at least one more sub-general. Although I have bought the necessary figures for two command bases from Legio Heroica, along with my last two infantry units, at the moment I'm inclined to stick with the 1980s recycled theme and make something up with whatever figures I have left over.

Thursday, 4 February 2021

Late Roman Camp


I struggled for a while to think of how to depict a fortified camp for my Romans. Although there are some excellent castings of classic Roman camps fortifications and tents available, these never look right to me when the constraints of a 120 x 80mm base leaves space for only one or two tents - hardly enough for a patrol let alone a whole army! I considered just doing one corner of the camp or a gatehouse but that only really works if the camp is placed against a table edge.

Of course the camp doesn't need to be a literal camp - just something to represent logistics or something of consequence if captured by the enemy. In the case of a fortified camp, it also needs to look defensible. Whilst browsing for ideas, I came across this picture of a reconstructed Roman watchtower on Wikimedia Commons by Longbow4u under a creative commons licence.

So I decided to make my camp a scene around a roman watchtower based on this one. Apparently it was later realised that Roman watchtowers had an extra story - it must be said that the reconstruction looks rather stubby and not likely to provide a very good vantage point but stubby was good for my purposes as I wanted the complete camp to fit in a Useful Box with the rest of the army.

My start point for construction was a couple of 40x40mm laser-cut MDF bases as floors, two more as sides for the lower story and two 40x30mm bases as sides for the top story. I cut the other sides by hand from 2mm MDF then drilled holes for the rounded tops of the arched windows and door. The floors and roof were cut from mount board and the main base unit, again, was laser-cut MDG, backed with self-adhesive magnetic sheet from Magnetic Displays.

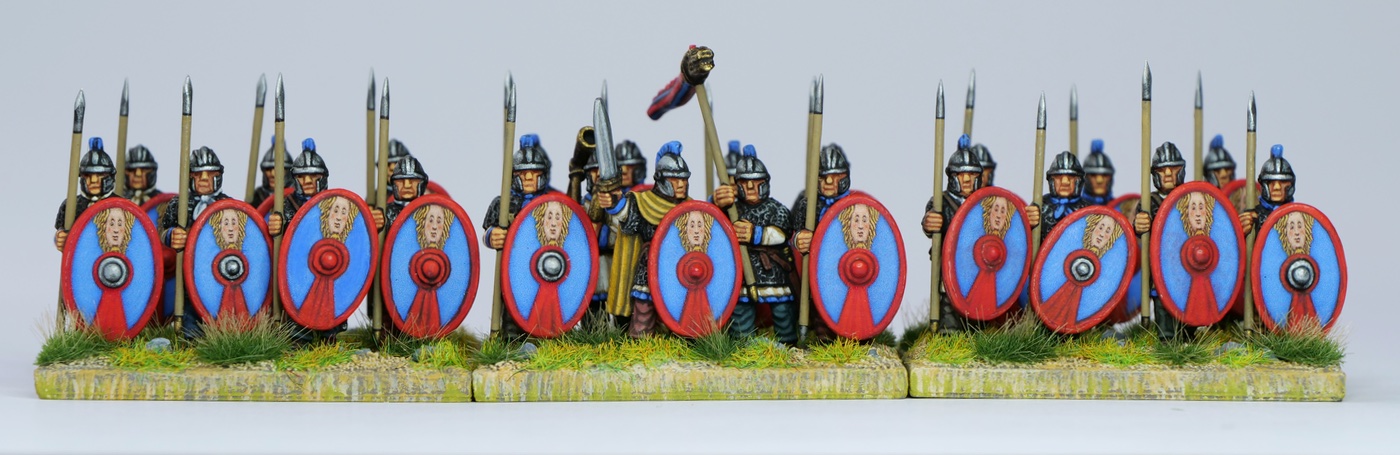
To populate the scene around the tower, I bought the pig-roast set from Baueda and re-purposed a couple of standard bearers (chosen because they were not carrying shields): a stocky Asgard figure in a round hat to act as the cooking supervisor and a standard bearer from Gladiator Miniatures, repurposed as an auxiliary infantryman who'd set his shield aside, to look out from the viewing platform. The Baueda figures have short-sleeved tunics so I modified them with a bit of filing and Miliput to have long sleeves to match with my other auxiliary infantry.

And there I stalled for a long time. 

Two obstacles: a ladder to provide access to the platform and how to make the characteristic X-shaped railings? 

I ran through various ideas for the railings, none of which seemed practical but the eventual solution was quite easy. I cut the rails and uprights from 1mm square section plastic and glued them together on a carefully drawn template. For the Xs , I cut a trip of 0.7mm Plasticard, scribed it off to the correct height with the sharp corner of my vernier calipers, drew on the X and cut it out with a sharp knife. It sounds a faff but it really was quite easy, if repetitive.


The ladders arrives in a pack of two long lengths from Plastruct - gives me some spare to be left in Normandy orchards, barns or wherever. The side rails on the ladders are very thick so I thinned them down considerably before painting.

The roof tiles are the last of the Wills Pantiles, that I used for my Italian Wars buildings. Flushed with enthusiasm, I ordered another pack with future ideas of renaissance towers and 4th C basilica. The ridge tiles are bamboo barbecue skewers with a V sanded onto one side and thin saw cuts 3 or 4 mm apart on the other then whittled to give the appearance of overlapping tiles.

I used my usual buildings technique of sticking on small rectangles cut from old business cards to represent stone blocks then gave the wall and roof surfaces a wash over of dilute filler to add texture and smooth out the sharp corners. 


As I mentioned, I wanted the finished camp to fit in a Really Useful box and even with this "one story short of a tower" reconstruction, that wasn't possible so I decided to split the roof off, attached with magnetic sheets into a square recess.


I paint pantile roofs with a tester pot of terracotta textures masonry paint. Next, I pick out individual tiles in contrasting tones of browns and greens. At this stage, it has far too much contrast but it all works out in the end. The next step is a wash of black Humbrol enamel and white spirit then finally (done after the photo below) a dry brush of the original masonry paint to blend it all back in 


I follow a similar process for the walls but with even more dry brushing. After an initial coat of DecoArt Country Maple, I dry brush Antique Gold (actually a yellow ochre) and Sandstone before picking out individual "stones" in different shades of brown, grey and green then more dry brushing with gradually lighter tones to blend it all back. There is no particular logic to the colour variations but the earlier buildings I did without this step just looked a bit plain.


The base is covered with the same combination of filler, grit, sand, static grass and tufts that I use for all my figure and scenery basing.

As well as the figures and pig roast set, I made a couple of spears and shields and discarded helmet from a spare Minifigs figure, as though the two cooks had set their weapons aside for a while whilst they prepare the food for the rest of their colleagues in the Petulantes Seniores.